Name/Title
Mrs Wm Sanders Dress cutting CourseEntry/Object ID
2005.09.01.15Scope and Content
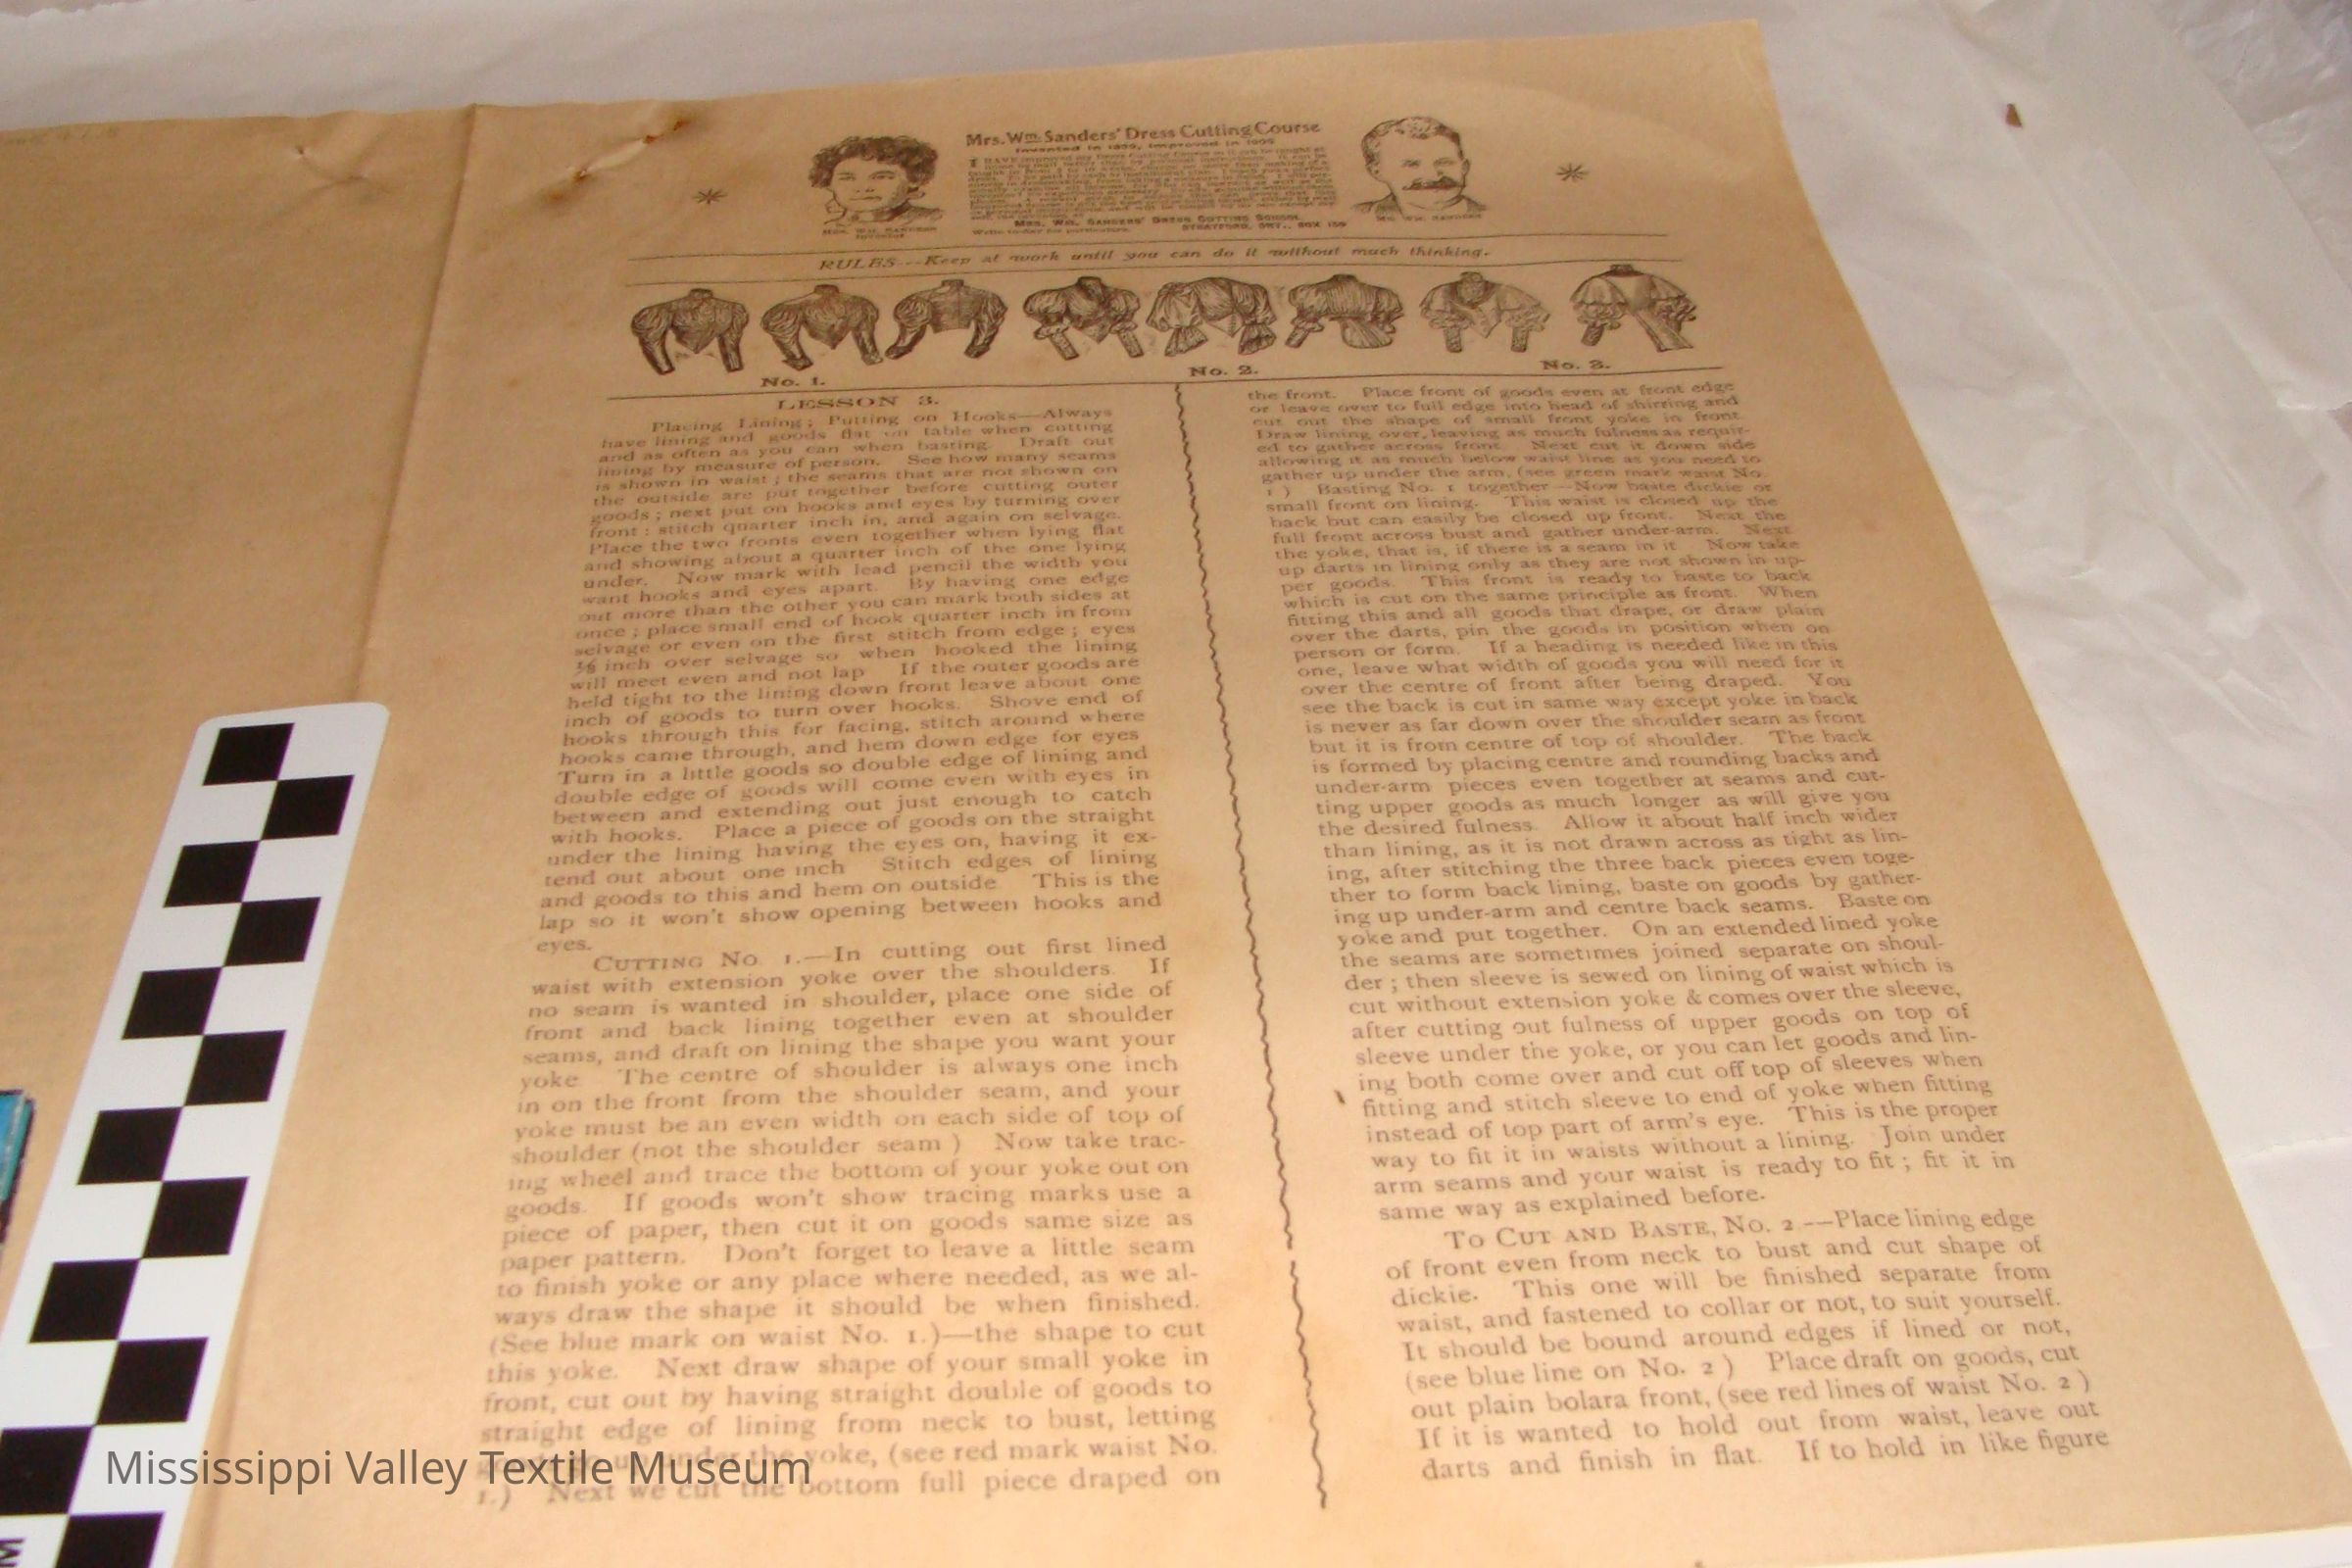
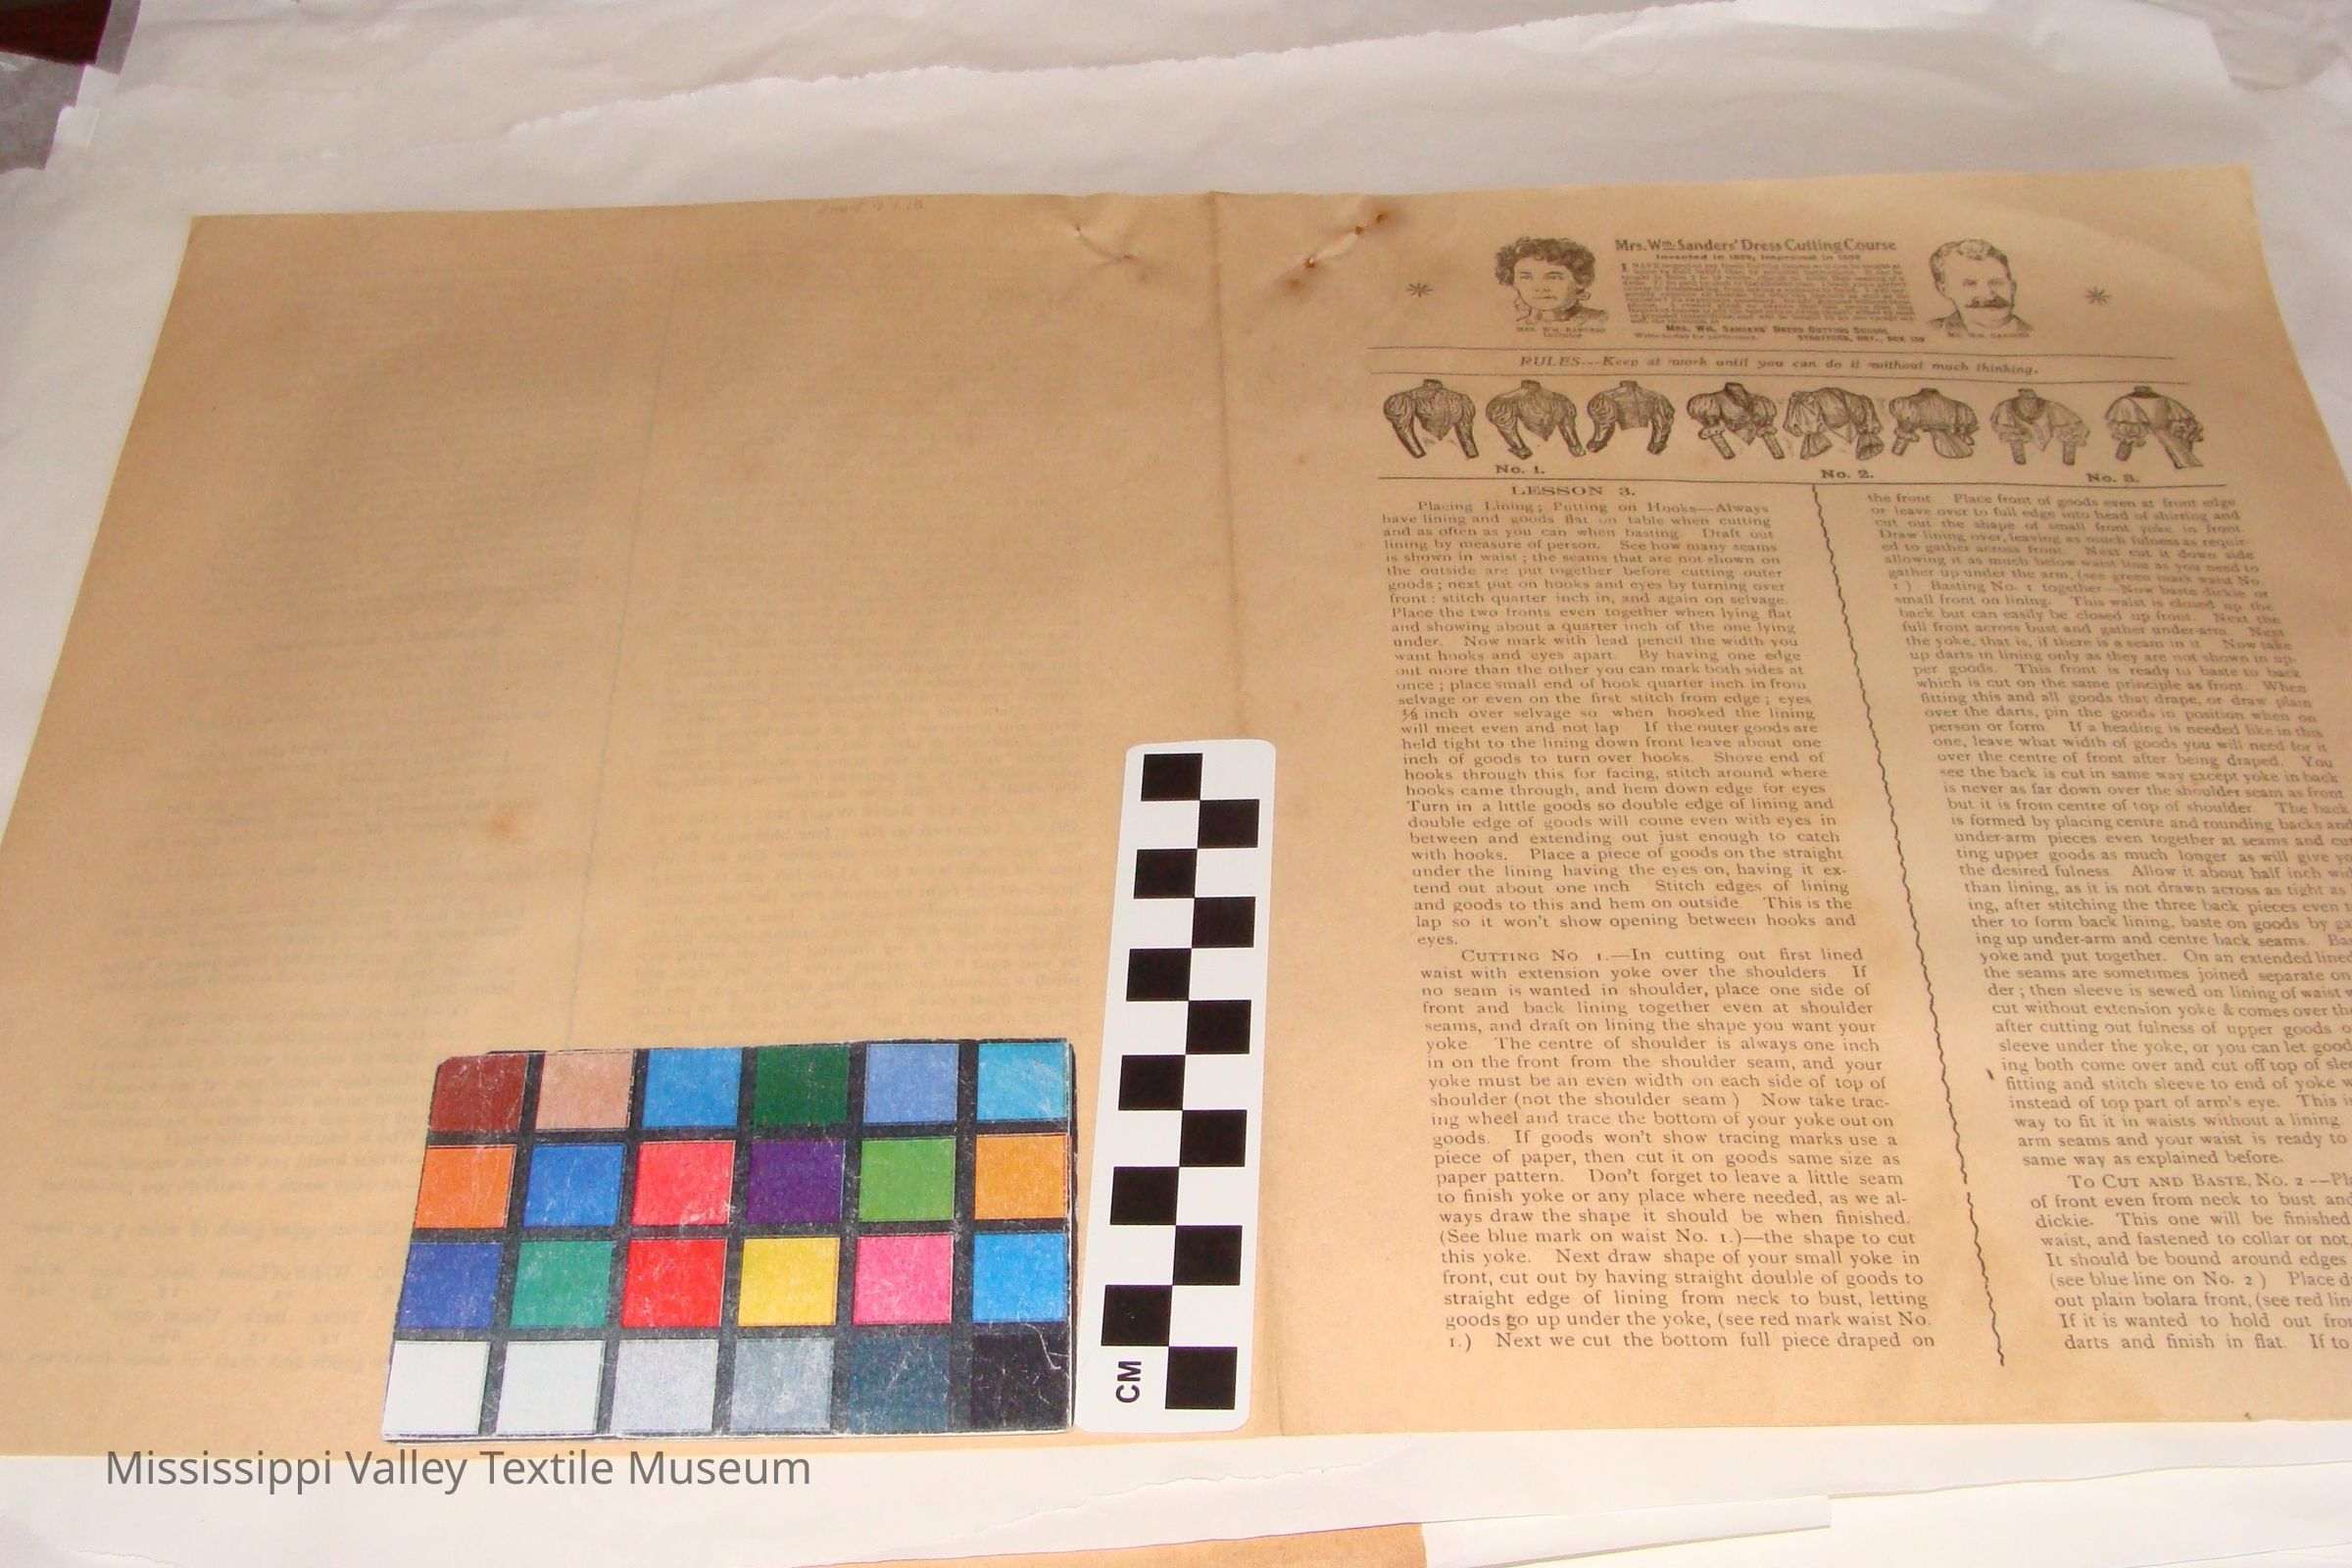
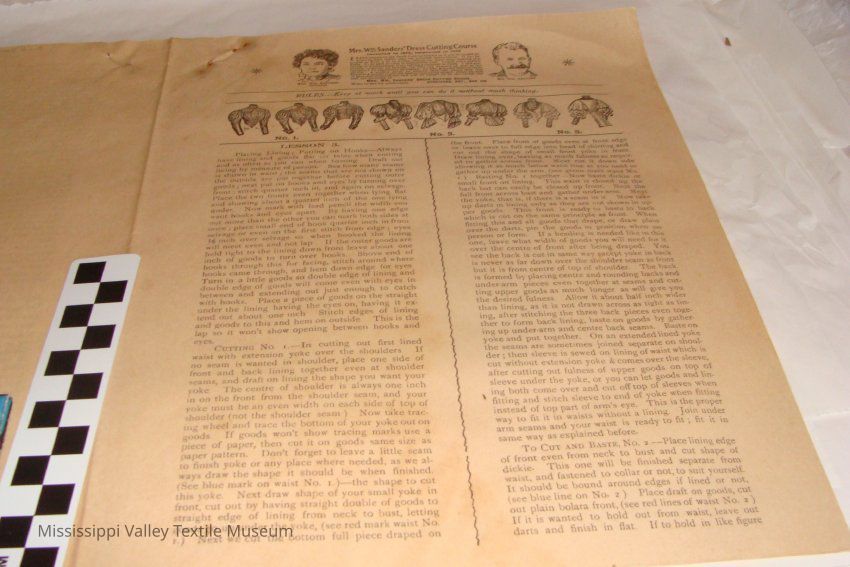
Mrs Wm Sanders Dress Cutting Course Lesson 3, page is double letter sized. 2 Collumns of info about dress cutting, 8 images of the top of the top of a dress, bodice up, at a few different styles.
Transcription :
Mrs. WM Sanders' Dress Cutting Course
invented in 1899, improved in 1905
I
HAVE improved my Dress Cutting Course so it can be taught at home by mail better than by personal instructions. It can be taught in from 2 to 10 weeks, charge no more than making of a dress. To be paid by cash Or installment plan. I teach you a perfect course in dressmaking, from taking a measure to finish. I will personally examine all lessons, for who can instruct as well as the inventor? No experience necessary. No adv. genuine without these photos. A reward given to anyone that can prove that this improved bourse is not the best course being taught, either by mail or personal instructions, and will be taught by no ono except myself, the inventor* at
MRS. WM SANDERS' DRESS CUTTING SCHOOL
Write to day for particulars. STRATFORD, ONT., BOX Ifi9
RULES--Keep at work until you can do it without much thinking.
LESSON 3.
Placing Lining; Putting on Hooks-Always have lining and goods flat on table when cutting and as often as you can when basting. Draft out lining by measure of person. See how many seams is shown in waist; the seams that are not shown on the outside are put together before cutting outer goods; next put on hooks and eyes by turning over front: stitch quarter inch in, and again on selvage. Place the two fronts even together when lying flat and showing about a quarter inch of the one lying under. Now mark with lead pencil the width you want hooks and eyes apart. By having one edge out more than the other you can mark both sides at once ; place small end of hook quarter inch in from selvage or even on the first stitch from edge; eyes % inch over selvage so when hooked the lining will meet even and not lap If the outer goods are held tight to the lining down front leave about one inch of goods to turn over hooks. Shove end of hooks through this for facing, stitch around where hooks came through, and hem down edge for eyes Turn in a little goods so double edge of lining and double edge of goods will come even with eyes in between and extending out just enough to catch with hooks. Place a piece of goods on the straight under the lining having the eyes on, having it extend out about one inch Stitch edges of lining and goods to this and hem on outside. This is the lap so it won't show opening between hooks and eyes.
CUTTING NO. I.-In cutting out first lined waist with extension yoke over the shoulders. If no seam is wanted in shoulder, place one side of front and back lining together even at shoulder seams, and draft on lining the shape you want your yoke. The centre of shoulder is always one inch in on the front from the shoulder seam, and your yoke must be an even width on each side of top of shoulder (not the shoulder seam ) Now take tracing wheel and trace the bottom of your yoke out on goods. If goods won't show tracing marks use a piece of paper, then cut it on goods same size as paper pattern. Don't forget to leave a little seam to finish yoke or any place where needed, as we always draw the shape it should be when finished. (See blue mark on waist No. i.)-the shape to cut this yoke. Next draw shape of your small yoke in front, cut out by having straight double of goods to straight edge of lining from neck to bust, letting goods go up under the yoke, (see red mark waist No. i.) Next we cut the bottom full piece draped on the front. Place front of goods even at front edge or leave over to full edge into head of shirring and cut out the shape of small front yoke in front. Draw lining over, leaving as much fulness as required to gather across front. Next cut it down side allowing it as much below waist line as you need to gather up under the arm, (see green mark waist No. 1 ) Basting No. 1 together-Now baste dickie or small front on lining. This waist is closed up the back but can easily be closed up front. Next the full front across bust and gather under-arm. Next the yoke, that is, if there is a seam in it Now take up darts in lining only as they are not shown in upper goods. This front is ready to baste to back which is cut on the same principle as front. When fitting this and all goods that drape, or draw plain over the darts, pin the goods in position when on person or form. If a heading is needed like in this one, leave what width of goods you will need for it over the centre of front after being draped. You see the back is cut in same way except yoke in back is never as far down over the shoulder seam as front but it is from centre of top of shoulder. The back is formed by placing centre and rounding backs and under-arm pieces even together at seams and cutting upper goods as much longer as will give you the desired fulness. Allow it about half inch wider than lining, as it is not drawn across as tight as lining, after stitching the three back pieces even together to form back lining, baste on goods by gathering up under-arm and centre back seams. Baste on yoke and put together. On an extended lined yoke the seams are sometimes joined separate on shoulder; then sleeve is sewed on lining of waist which is cut without extension yoke & comes over the sleeve, after cutting out fulness of upper goods on top of sleeve under the yoke, or you can let goods and lin- ing both come over and cut off top of sleeves when fitting and stitch sleeve to end of yoke when fitting instead of top part of arm's eye. This is the proper way to fit it in waists without a lining. Join under arm seams and your waist is ready to fit; fit it in same way as explained before.
To CUT AND BASTE, NO. 2.-Place lining edge of front even from neck to bust and cut shape of dickie. This one will be finished separate from waist, and fastened to collar or not, to suit yourself. It should be bound around edges if lined or not, (see blue line on No. 2 ) Place draft on goods, cut out plain bolara front, (see red lines of waist No. 2 ) If it is wanted to hold out from waist, leave out darts and finish in flat. If to hold in like figure
around bust take in the darts in this plain one, if lined this would be the lining of bolara, or if you did not want it draped you could use this for plain bolara by covering with goods Cut this one about one inch longer than the mark you drew for shape around bottom because when darts are taken in the edges won't be even and you want something to pare after darts are in, or when finished it will be too short if one inch is not allowed Next cut draped bolara, (see green mark No. 2.) Extend out al front the fulness you want on shoulder. Cut a plain one on paper and cut it in two at the red line X Open it at bottom but not at top until it is sprung out at sides and under arm's eye, (see green lines X showing how far to open the plain pattern to give spring to drape for full draped front. Of course the edges of green lines at arm's eye and sides should be basted into the under-arm seam and arm's eye even, throwing the spring to the front. Next cover under part of waist plain or full using a wide piece to form crushed belt effect. Cut revear on bottom of bolara by drawing the shape around bottom of plain bolara; after darts are in, if taken in, also revear on front of shoulder and bust. Cut these out on paper by placing a piece under lining and tracing through lining on paper the shape you want. All little shapes like these are done the same way, (see red mark for revears or straps on waist No. 2 ) You pin these pieces on waist when fitting so you will be sure it looks the right size and are in right position. (We teach how to cut collars in next lesson.) For back-place the three back pieces even at seams and cut neck even, allowing all fulness in shoulder. Gather back goods on lining, shirring shoulder as often as you like ; finish basting back, baste full bolara on plain, next on lining, or it can be made to drape and fasten on lining of waist, having imitation of crushed or plain belt under. Baste seams together and baste the same as explained before, after which place on patterns of revears, dickie, or any small shape that goes on waist.
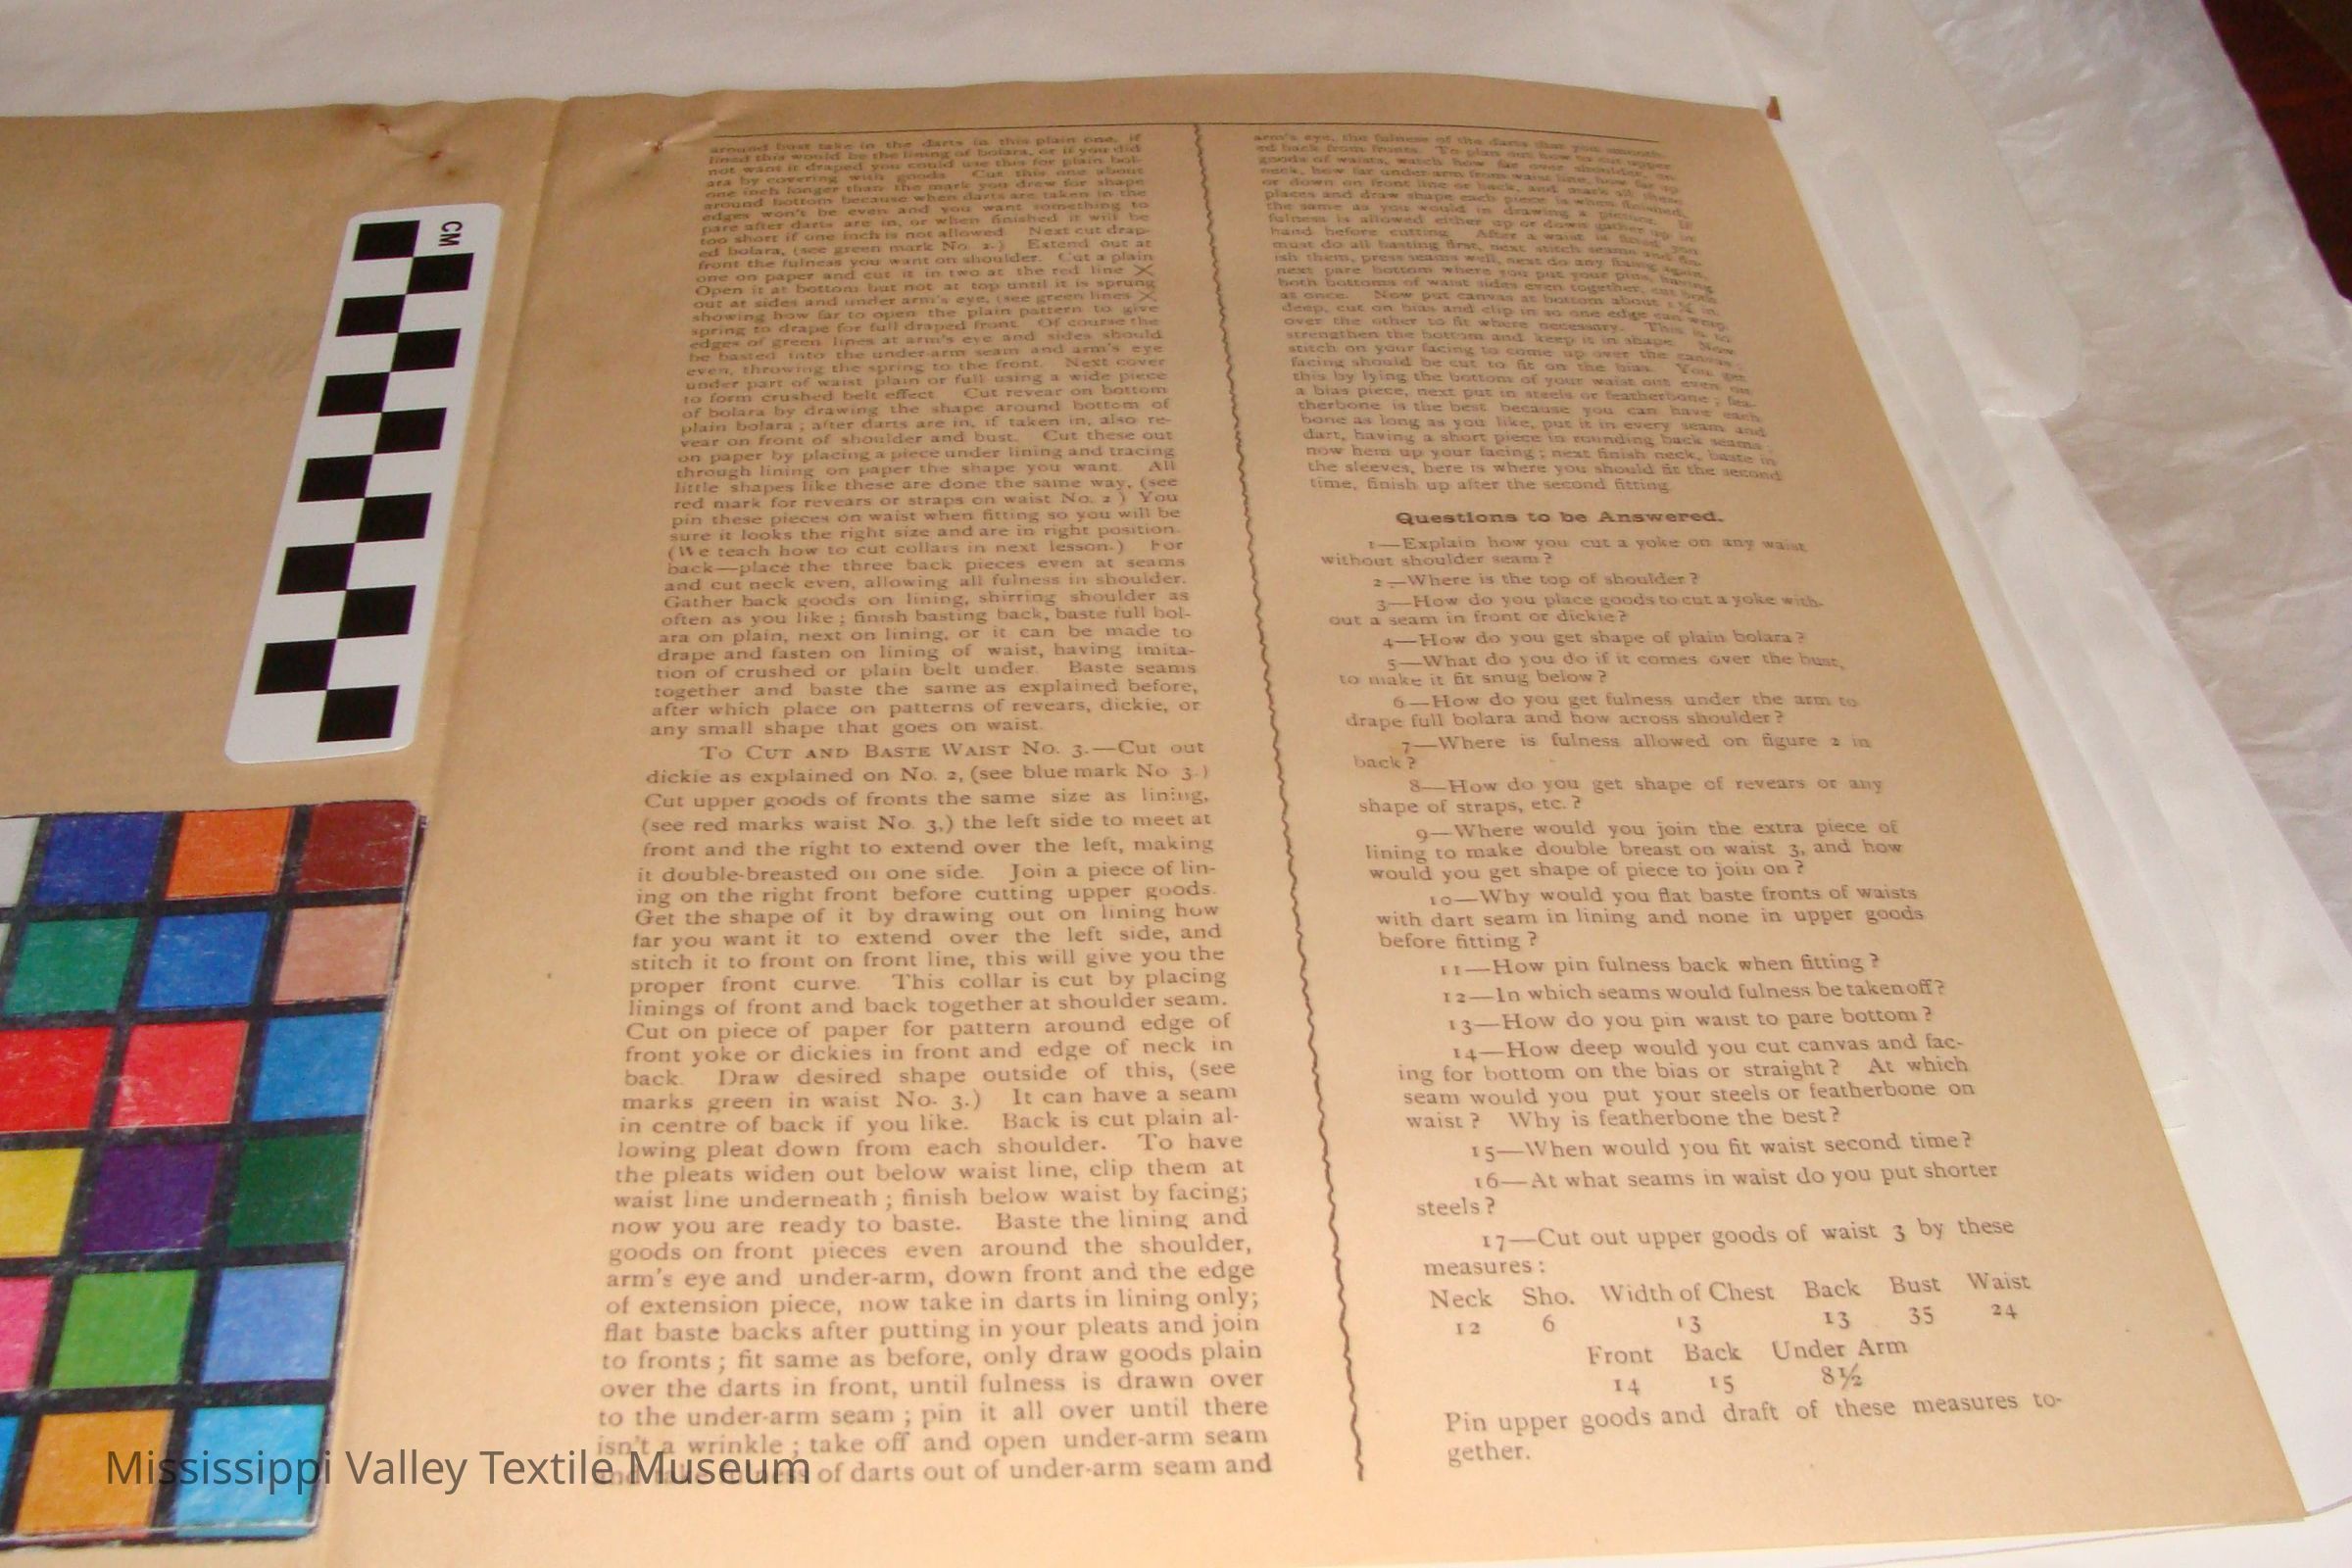
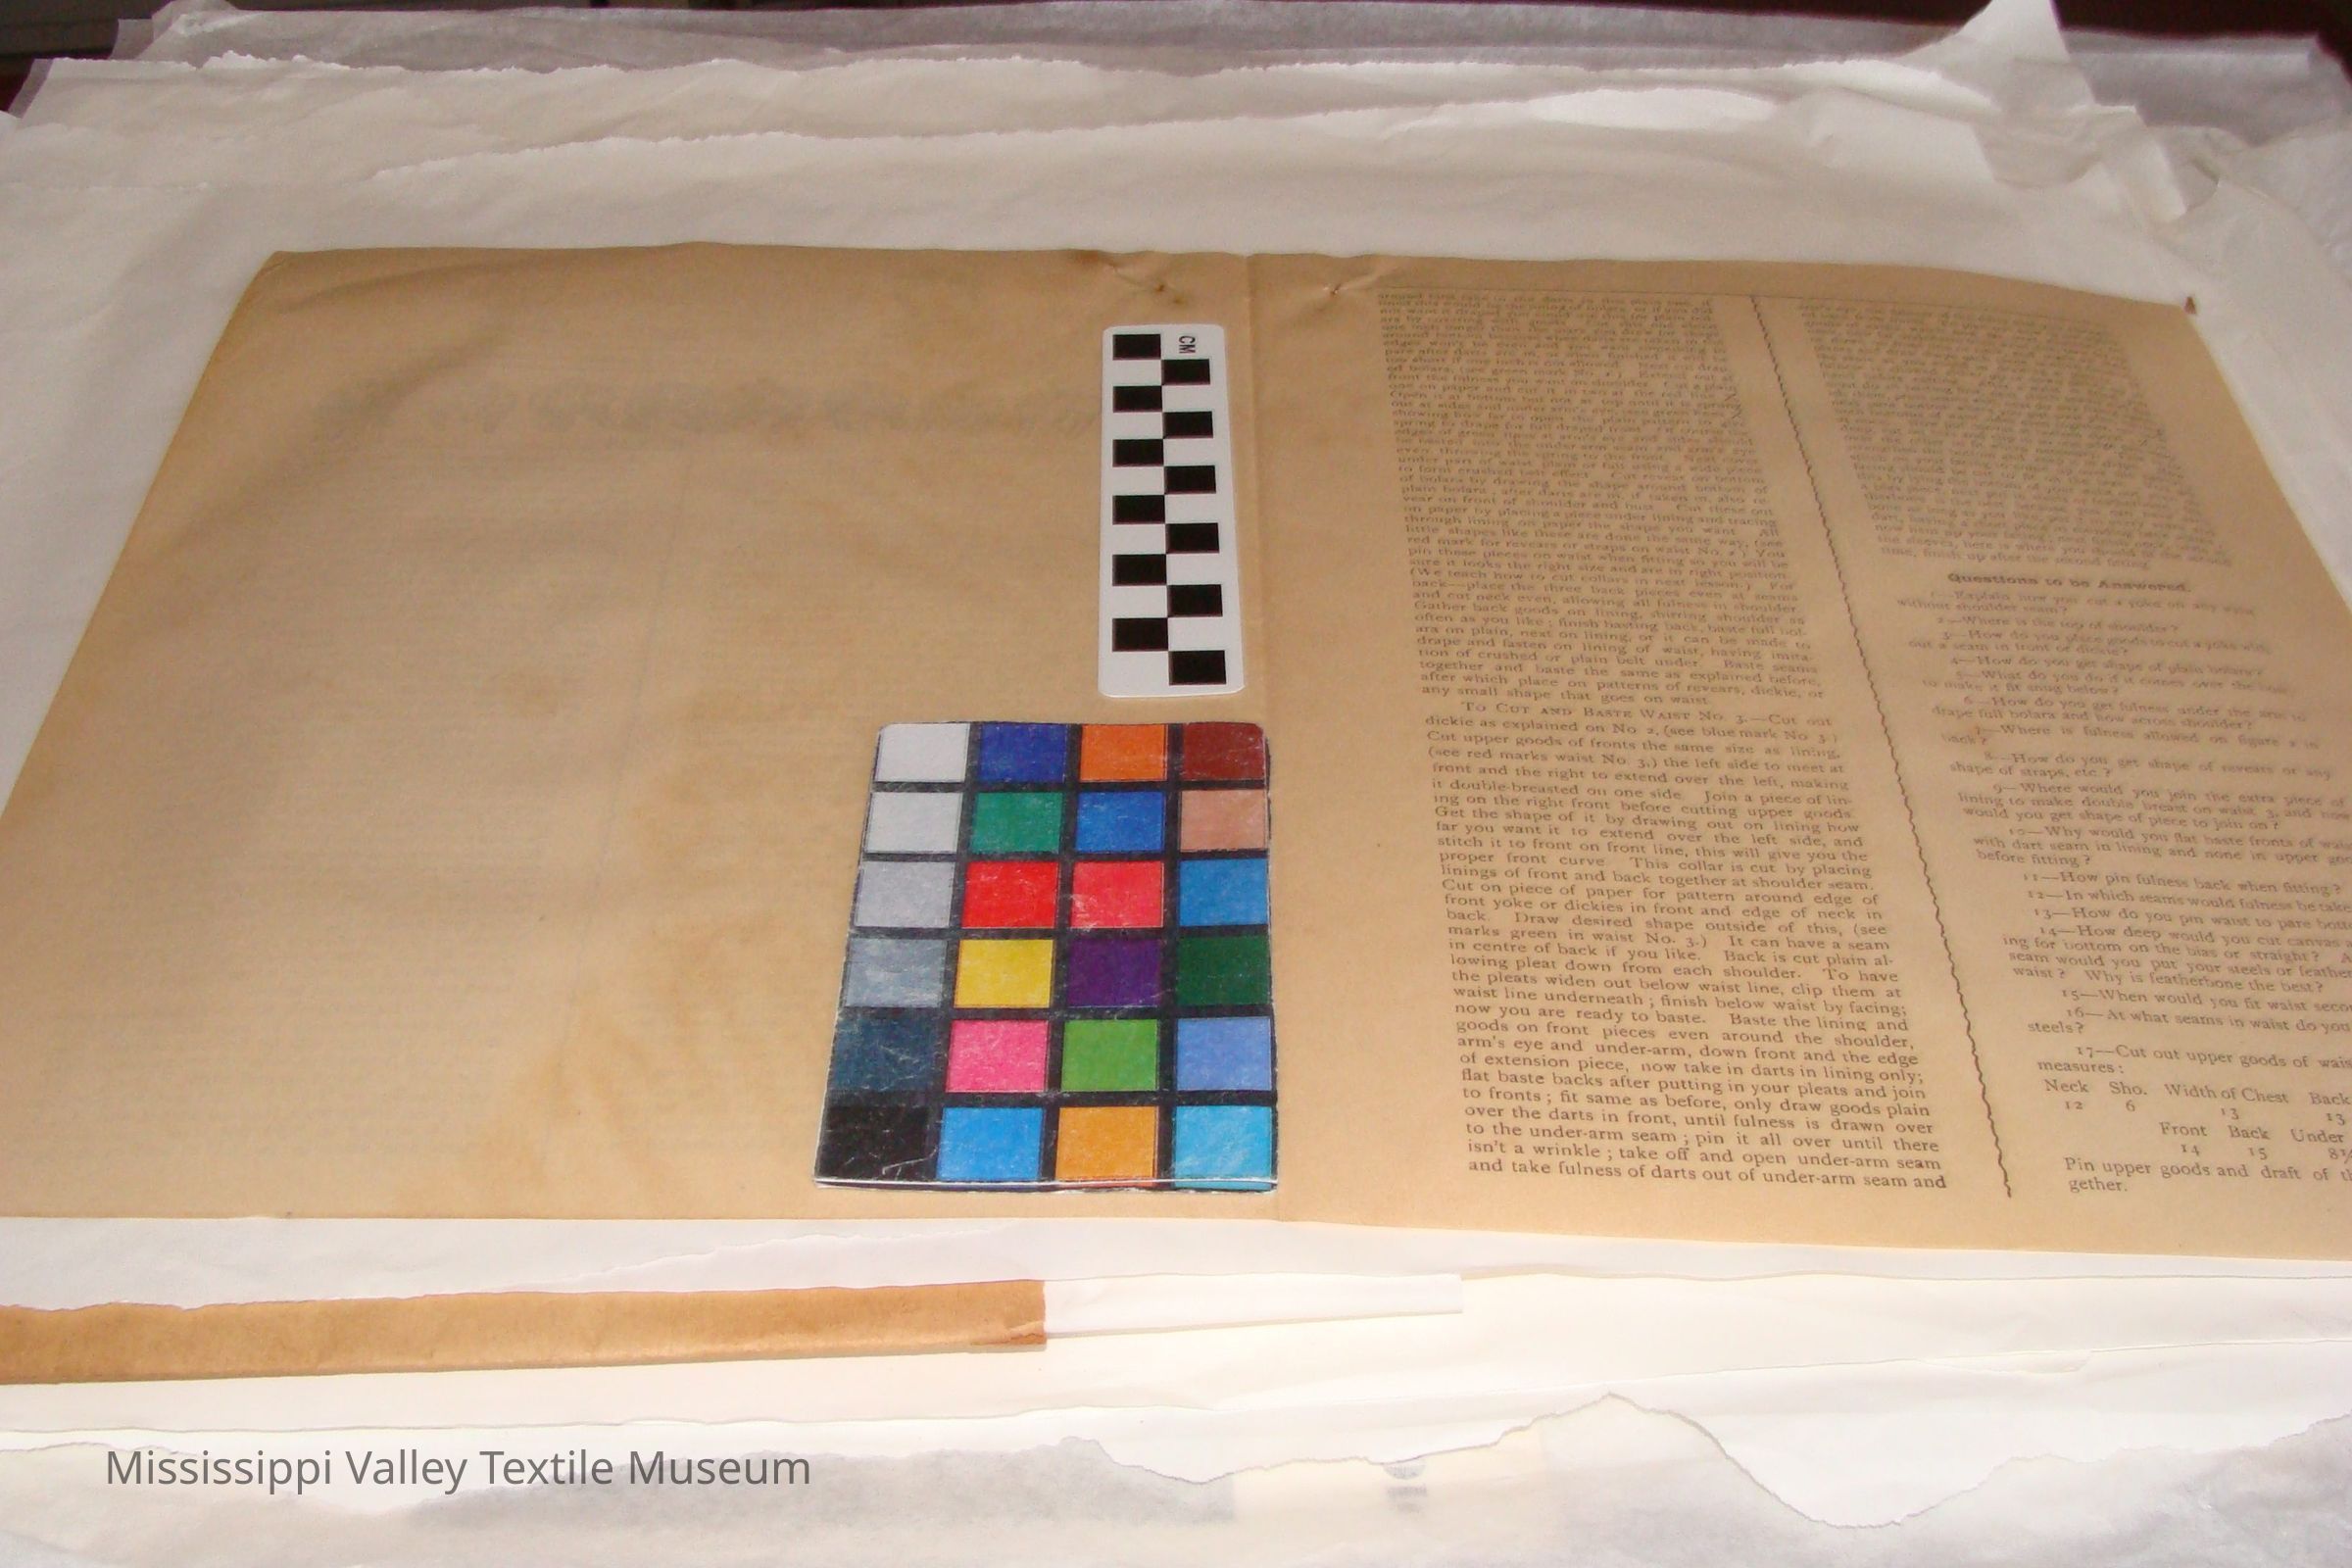
To CUT AND BASTE WAIST No. 3.-Cut out dickie as explained on No. 2, (see blue mark No 3.) Cut upper goods of fronts the same size as lining, (see red marks waist No. 3,) the left side to meet at front and the right to extend over the left, making it double-breasted on one side. Join a piece of lining on the right front before cutting upper goods. Get the shape of it by drawing out on lining how far you want it to extend over the left side, and stitch it to front on front line, this will give you the proper front curve. This collar is cut by placing linings of front and back together at shoulder seam. Cut on piece of paper for pattern around edge of front yoke or dickies in front and edge of neck in back. Draw desired shape outside of this, (see marks green in waist No. 3.) It can have a seam in centre of back if you like. Back is cut plain allowing pleat down from each shoulder. To have the pleats widen out below waist line, clip them at waist line underneath ; finish below waist by facing; now you are ready to baste. Baste the lining and goods on front pieces even around the shoulder, arm's eye and under-arm, down front and the edge of extension piece, now take in darts in lining only; flat baste backs after putting in your pleats and join to fronts; fit same as before, only draw goods plain over the darts in front, until fulness is drawn over to the under-arm seam ; pin it all over until there isn't a wrinkle ; take off and open under-arm seam and take fulness of darts out of under-arm seam and arm's eye, the fulness of the darts that you smoothed back from fronts. To plan out how to cut upper goods of waists, watch how far over shoulder, on neck, how far under-arm from waist line, how far up or down on front line or back, and mark all these places and draw shape each piece is when finished, the same as you would in drawing a picture. If fulness is allowed either up or down gather up in hand before cutting After a waist is fitted you must do all basting first, next stitch seams and finish them, press scams well, next do any fixing again, next pare bottom where you put your pins, having both bottoms of waist sides even together, cut both at once. Now put canvas at bottom about >n- deep, cut on bias and clip in so one edge can wrap over the other to fit where necessary. This is to strengthen the bottom and keep it in shape. Now stitch on your facing to come up over the canvas; facing should be cut to fit on the bias. You get this by lying the bottom of your waist out even on a bias piece, next put in steels or featherbone; fea-therbone is the best because you can have each bone as long as you like, put it in every seam and dart, having a short piece in rounding back seams ; now hem up your facing; next finish neck, baste in the sleeves, here is where you should fit the second time, finish up after the second fitting.
Questions to be Answered.
i-Explain how you cut a yoke on any waist without shoulder seam ?
2-Where is the top of shoulder ?
3-How do you place goods to cut a yoke with-out a seam in front or dickie?
4-How do you get shape of plain bolara ?
5-What do you do if it comes over the bust, to make it fit snug below?
6-How do you get fulness under the arm to drape full bolara and how across shoulder?
7-Where is fulness allowed on figure 2 in back ?
8-How do you get shape of revears or any shape of straps, etc. ?
9-Where would you join the extra piece of lining to make double breast on waist 3, and how would you get shape of piece to join on ?
10-Why would you flat baste fronts of waists with dart seam in lining and none in upper goods before fitting ?
11-How pin fulness back when fitting ?
12-In which seams would fulness betakenoff?
T3-How do you pin waist to pare bottom ?
*4-How deep would you cut canvas and facing for bottom on the bias or straight ? At which seam would you put your steels or featherbone on waist ? Why is featherbone the best?
15-When would you fit waist second time?
16-At what seams in waist do you put shorter steels ?
17-Cut out upper goods of waist 3 by these measures:
Neck Sho. Width of Chest Back Bust Waist
12 6 13 13 . 35 24
Front Back Under Arm
14 J5 8%
Pin upper goods and draft of these measures together.
[end]Collection
Patterns CollectionCataloged By
Whit, ElizabethLexicon
Nomenclature 4.0
Nomenclature Primary Object Term
PatternNomenclature Sub-Class
Needleworking EquipmentNomenclature Class
Textileworking T&ENomenclature Category
Category 04: Tools & Equipment for MaterialsLOC Thesaurus for Graphic Materials
DressmakingLocation
Location
Container
Box 5Shelf
Shelf 19Room
Collections RoomBuilding
M.V.T.M.Category
PermanentDate
November 7, 2023Location
Container
Box 2Shelf
Shelf 7, Shelf 7Room
Collections RoomBuilding
M.V.T.M.Category
PermanentMoved By
Whit, ElizabethDate
August 24, 2017Location
Container
Box 5Shelf
Shelf 19, Shelf 19Room
Collections RoomBuilding
M.V.T.M.Category
PermanentMoved By
Whit, ElizabethDate
August 24, 2017Location
Container
Box 2Shelf
Shelf 12, Shelf 12Room
Collections RoomBuilding
M.V.T.M.Category
PermanentMoved By
Whit, ElizabethDate
July 29, 2016General Notes
Note
Status: OK
Status By: Cotter, Ellen
Status Date: 2022-02-08Created By
admin@catalogit.appCreate Date
July 29, 2016Updated By
admin@catalogit.appUpdate Date
November 12, 2023